
After a long time, I have once again decided to publish a non-soundtrack entry on my blog. There may very well be more of these in the future and I’m already thinking about grouping them into their own category on the main page. But don’t worry, dear film music aficionados, HQCovers will continue to be a blog primarily dedicated to original and customized soundtrack artworks. Still, please bear with me if I deviate from this approach every now and then. For example, today.
A few weeks ago I accidentally stumbled on an open source freeware called “Ultimate Vocal Remover” and after a few test runs I was really astonished by the quality it produced. This little AI-powered tool works like magic and separates the tracks of any song you feed it with. All of a sudden it was possible to create songs without a drum track, without a background choir, clean vocal stems or instrumentals that (almost) sounded as if they had been sampled directly from the studio console. With the help of community created processing models, you could create a near-perfect karaoke track that includes all instruments and backup vocals, whilst filtering out the lead singer. And that’s what I did with some of my favorite artists and Pearl Jam, the Seattle grunge legends, was one of them.

Of course, this is an arts blog and I naturally felt the need to create an appropriate form of presentation. It was clear to me from the start that I couldn’t just go and add the instrumental versions as, let’s say, a Deluxe Editions to my digital music library. No, I came up with a plan of a comprehensive retrospective of the band’s work. A made-up compilation that collected all the highlights from all the studio albums, non-album tracks, b-sides and solo works, all neatly combined in a carefully curated package.
But how do you approach a project like this when you have well over 200 songs to choose from? Initially, I had planned a set of six CDs, with each CD containing selected highlights from two of their studio albums, to keep the whole thing manageable. But I quickly realized that many of my personal favourite songs would fall by the wayside if I had done it this way.
Okay, so each of the (so far!) eleven studio album gets its own CD then? No! With an average runtime of 75 minutes per CD that’d be far too much. That would basically be the band discography as a whole. But curating is one of the most fun aspects of a project like this.
Sure, I could just treat the whole thing as a purely digital release without any time constraints whatsoever. But that doesn’t suit Pearl Jam, a band that has been producing and selling their entire live catalogue as “official bootlegs” since the year 2000. Also, I wouldn’t have been able to use all these beautiful mockups… No, this was virtually begging for a physical release.
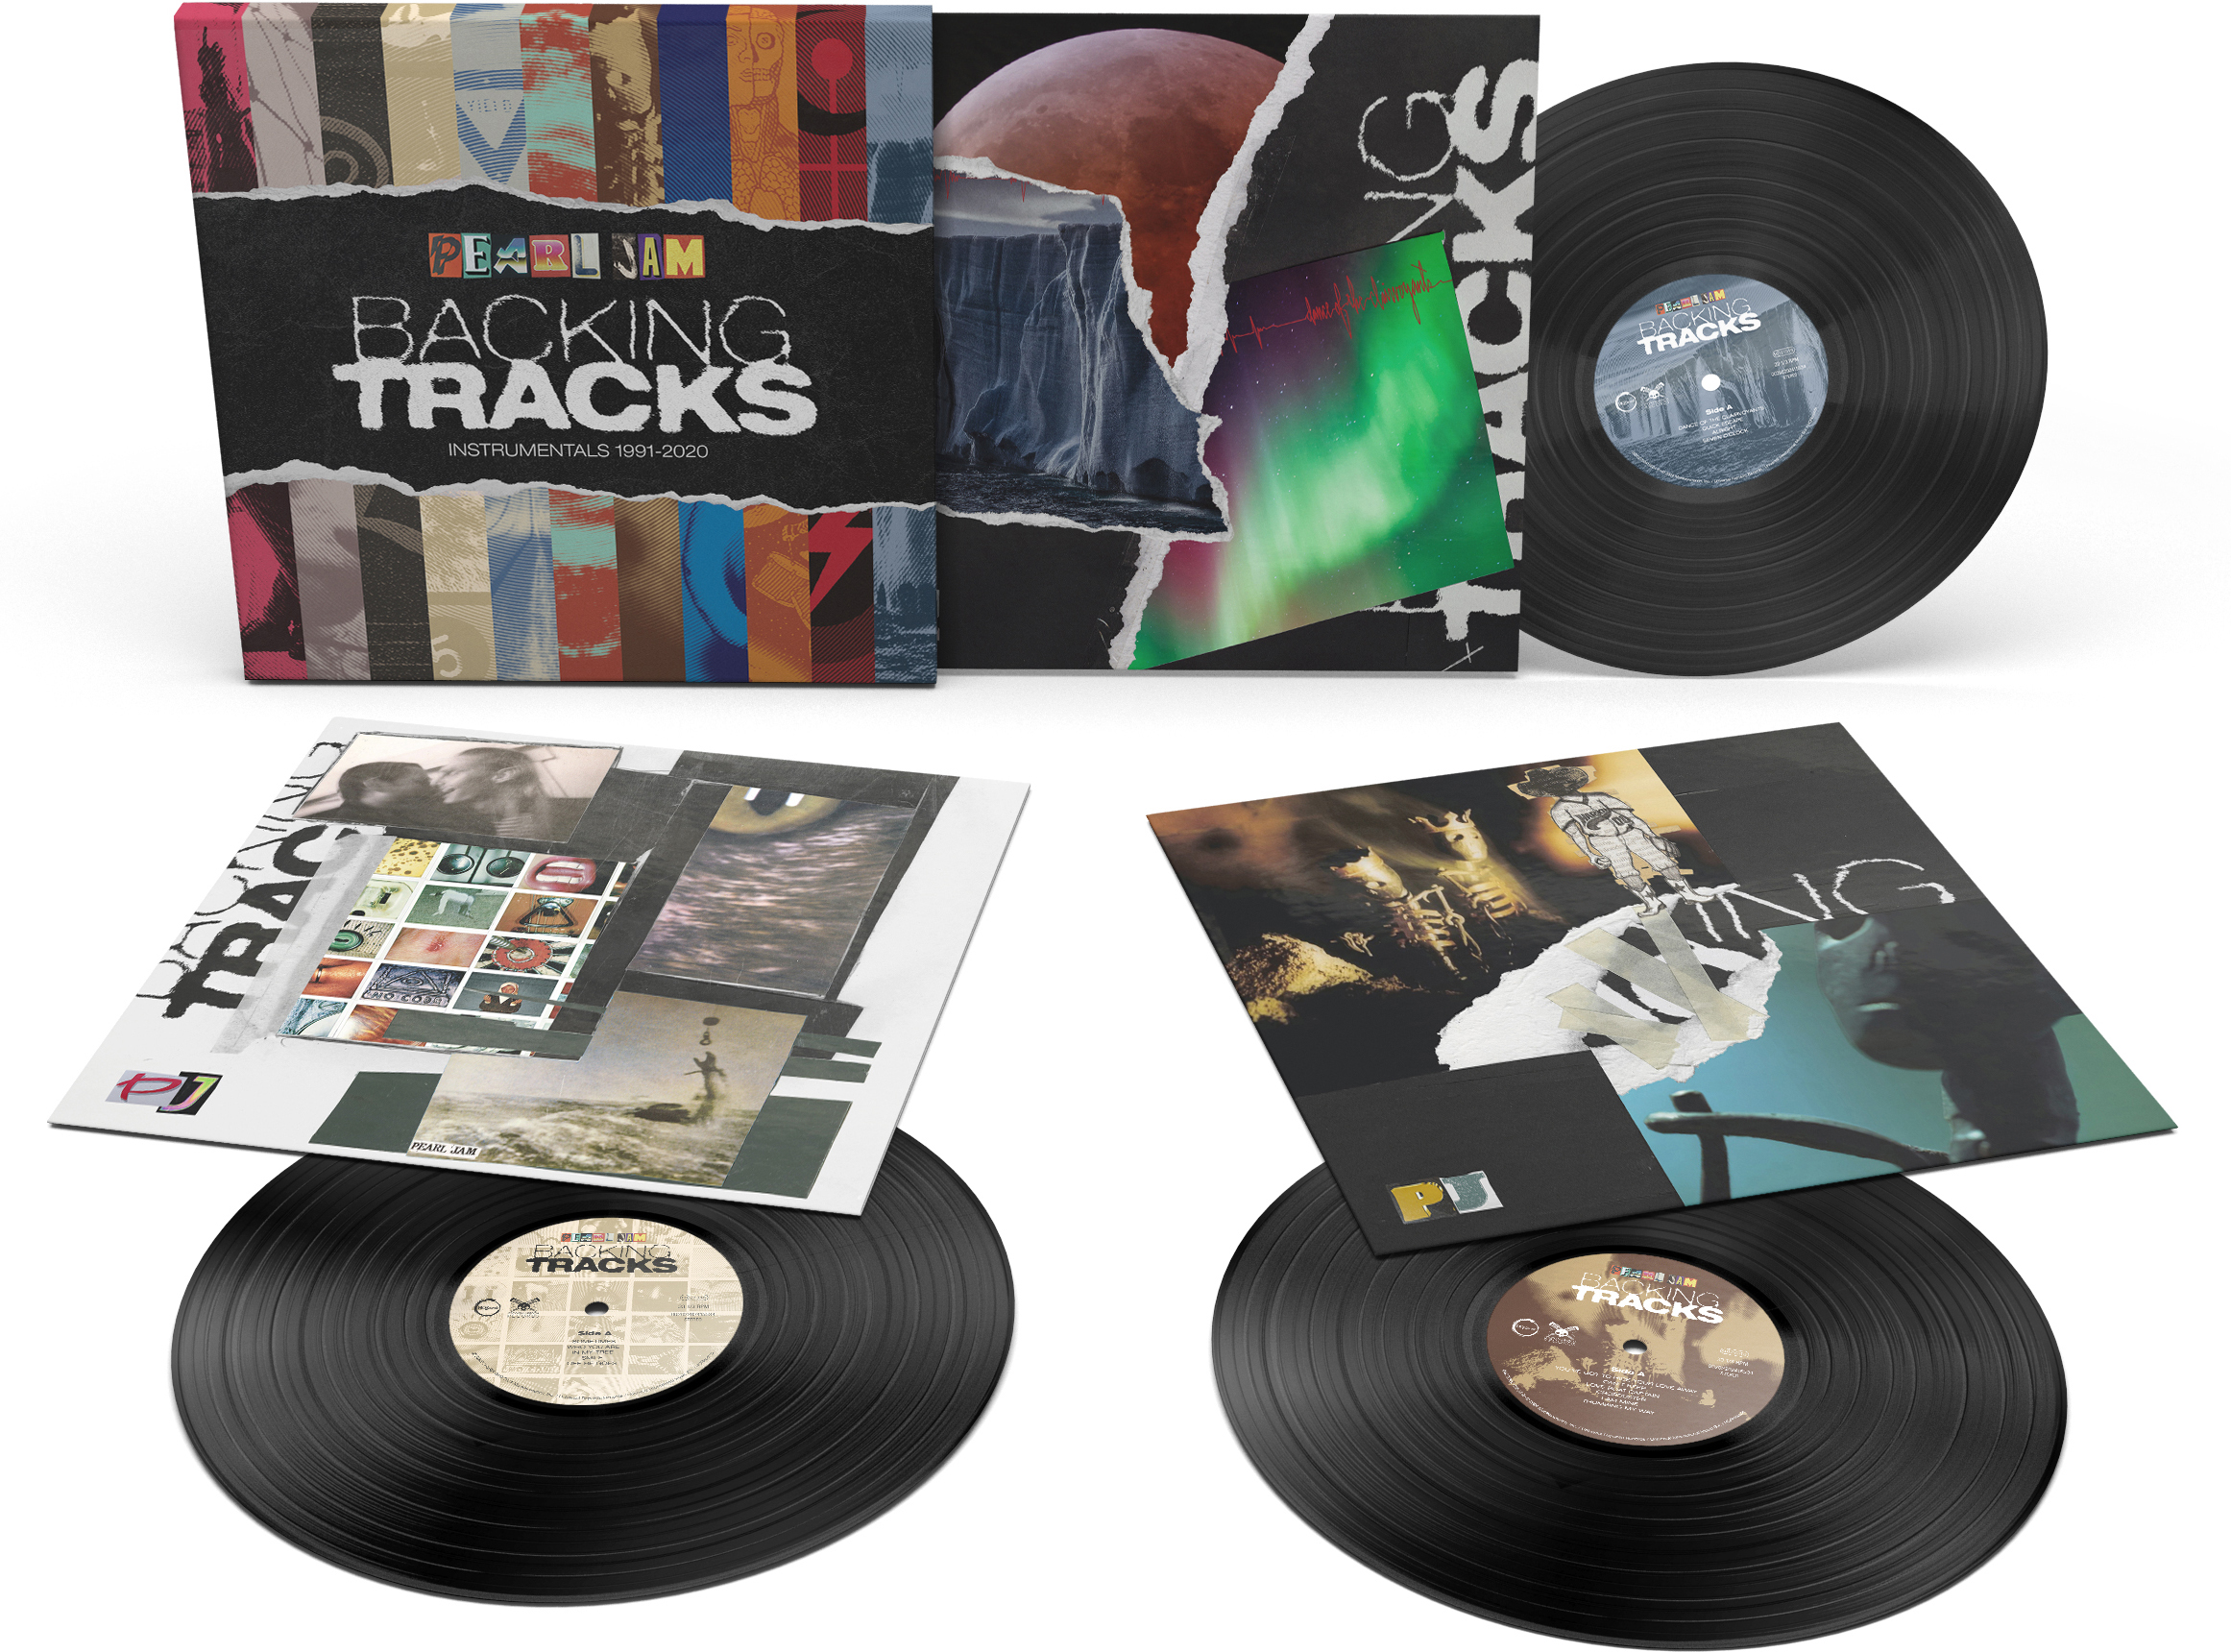
So, if six CDs are too few and eleven CDs are too many, then there’s only one thing left to do: it’s good old vinyl then. In my imagination, we’re talking about a thick cardboard slipcase that houses eleven 12-inch LPs with a slim spine, no gatefold, so that the whole set would be nice and handy. A front and back cover had to be designed, as well as two labels for each side of the records and an overall cover for the slipcase. The discs were to be black heavyweight 180g 12-inch records with 33+1⁄3 rpm, which means that each side would hold a maximum of 22 minutes of music. That seemed doable. This is the way!
Choosing the music for each record was more difficult than I had originally thought. There were so many things to consider. Of course I wanted to include my own personal favourites. Album singles were a no-brainer. From a commercial point of view, however, it was also logical to include all non-album singles, such as covers and compilation or soundtrack contributions. And then there are the deep cuts, the fan-favourites, without which a proper Pearl Jam compilation wouldn’t even be allowed to exist. Decisions, decisions…
On top of that, I had to keep an eye on the runtime. At your average song length, no more than five or six songs per side were possible, no overlength. I made it a point that each record had a realistic duration, so that it could actually be pressed in a record plant like that. Let’s just say it was a complicated mathematical equation that I was ultimately only able to solve by throwing Eddie Vedder’s (the lead singer) solo forays into the ring as well, thus creating a well-rounded and, for me, satisfying musical overview in chronological order.
One small but important aspect that I hadn’t originally considered was that I also had to create the instrumentals using the software I mentioned at the beginning. Again, there were a few pitfalls and hurdles that had to be overcome. Some songs just didn’t like to be run through the algorithm without sounding like shite afterwards. Others needed several passes and still others I had to mix by hand with Audacity to get the perfect instrumental track. In short: it was a chore.
But listening to the results, no matter where, whether it was while I was cooking, in the shower, in the car, or even when reading the really excellent band chronicles Pearl Jam Twenty, it was more than worth the efforts.
All custom covers on this project have been realized using different templates from BLKMARKET and Flyerwrk, two of my favorite template stores out there. The product mockups all come from my ever-growing collection of Photoshop templates. My goal was to come up with a blend of hand-made collage and 90s retro TV aesthetics. Think MTV bumper ads in a VHS look, all very raw and deliberately janky. I felt that this art style fit well with the grunge genre that the band comes from. To achieve this, I had to edit and combine some of the textures and assets to make them fit well with the original Pearl Jam covers that are featured on every front cover of these eleven albums.
A key feature of these designs is the fuzzy and ragged font effect for the logo, which I was able to create manually using a Photoshop tutorial. Updating the tracklists on the back covers was a bit complicated and time-consuming. Each time after I made my text edits, I had to re-render the font in several steps. I’m sure there’s a simpler and quicker solution to this, but I’m just an amateur who’s just trying to figure it out.

The final product mockups are always the last and – for me – most rewarding step in projects like this. I just love testing the Photoshop templates and choosing the right ones. When I apply the individual covers and graphics and watch my designs gradually come together into a physical product render, it’s always a reward in itself. Please make sure you open them in a new browser tab to see all the details.
One last detail I paid special attention to in this project was the images of the record labels (#4, #7, #10, etc…). To match the style of the remaining covers and mockups, I wanted the black vinyl records to look old and scratched and kind of worn. A perfect, clean record would feel off somehow. Luckily, I was able to gather enough images of old vinyl records to give each of these images their own look (I hate repetition) and bring this project to a fitting conclusion.
")
 (Front)")
 (Back)")
 (Labels)")
 (Front)")
 (Back)")
 (Labels)")
 (Front)")
 (Back)")
 (Labels)")
 (Front)")
 (Back)")
 (Labels)")
 (Front)")
 (Back)")
 (Labels)")
 (Front)")
 (Back)")
 (Labels)")
 (Front)")
 (Back)")
 (Labels)")
 (Front)")
 (Back)")
 (Labels)")
 (Front)")
 (Back)")
 (Labels)")
 (Front)")
 (Back)")
 (Labels)")
 (Front)")
 (Back)")
 (Labels)")

Yeah, Ultimate Vocal Remover really is something, eh? I’m having a lot of fun playing around with it myself. I’m excited to see where the community can take this tech.
Oh, and great covers as always I guess I dunno I don’t listen to non-film music.
LikeLike